
アニメーション。
それはWEBサイトには欠かせない演出です。
最近のWEBサイトはアニメーションがかなり複雑になってきている印象です。
ただ、アニメーションって結構難しいですよね。
簡単なアニメーションならcssでちょちょっと書けばできますが、いくつものアニメーションが連動しているものになってくると難易度があがります。
とはいえ、そんな複雑なアニメーションでも、GSAPを使えばわりと簡単にできちゃいます。
目次
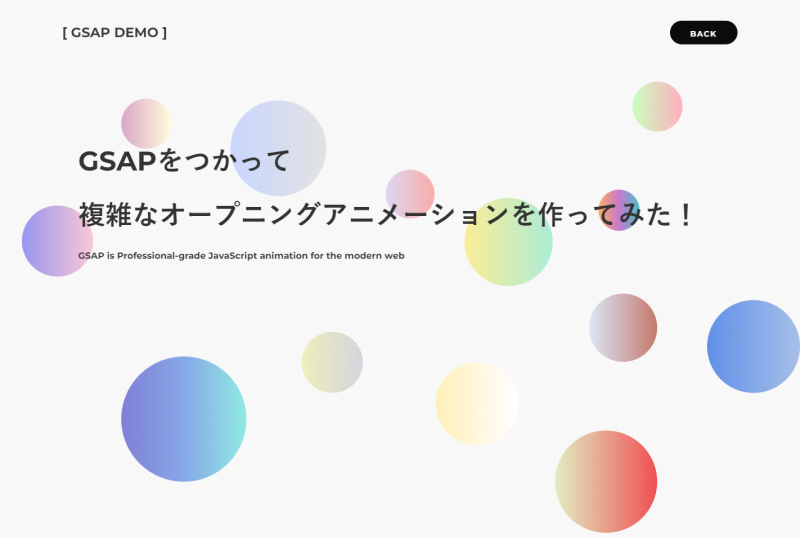
この記事で実装する完成デモ
この記事で実装するアニメーションの完成デモページは以下になります。
結構複雑そうですよね。
でも、GSAPを使えば簡単に実装できます!
GSAPとは?
GSAPとはアニメーションを実装するために特化したライブラリです。
公式サイト
GSAPには2つのライセンスがあります。
1つは「Standard License」。
もう1つが「Business License」です。
実はこのライブラリは、ある特定の条件で使用する場合に、有料の「Business Green」というものに会員登録しないといけません。
その条件は、ざっくりいうと、「そのサイトを利用するために、エンドユーザーがお金を払わないといけない場合」です。
例えば、ネットフリックスを利用するためには、毎月お金を払わないといけませんよね。
そういったサイトで使用する場合は、会員登録が必要です。
なので、通常のWEBサイト(弊社のようなWEBサイト)であれば、無料で使用することができます。
もし、あなたが利用しようとしている際にどのライセンスが必要か判断できなければ、以下の公式サイトをご覧ください。
上記サイトの、以下赤線で簡単な質問に答えるだけで通常のライセンスなのか、有料なのかがわかったりします。

さっそくアニメーションを作ってみよう!
改めて、この記事で実装するアニメーションの完成デモページをご覧ください。
これを作るために、まずはデザインデータを用意します。
デザインデータからSVGを書き出す
まずはデザイデータを適当に用意します。
※皆さんも適当にデザインツールを利用して作成してみてください。
ちなみに、以下のデザインはFigmaで作成しています。
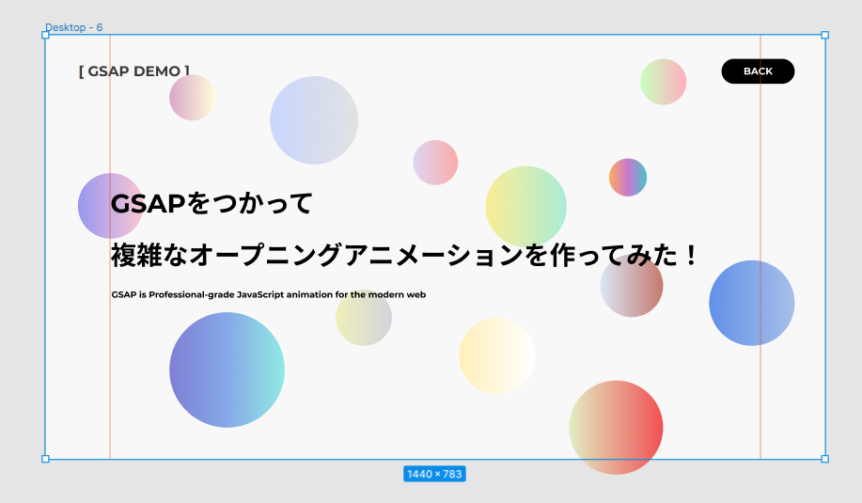
丸い図形を1つずつアニメーションで動かしたいので、1つ1つdivなどで作成して、それぞれをabsoluteで配置しなきゃいけないのかなと思いますが、実はもっと簡単に実装する方法があります。
その方法は、丸い図形をすべてグループ化し、SVGとして書き出して、absoluteで配置します。
なぜSVGかというと、このあとの工程でどうしてもSVGじゃないといけないからです。
書き出したSVGデータをIllustlatorで開く
書き出したSVGをイラストレータで開き、レイヤーを個別にわけて再度SVGで書き出します。
レイヤーを個別に分ける方法ですが、以下の記事を参考に行います。
Illustrator 一瞬で各要素を別々のレイヤーに分ける方法
また、書き出す際には以下の記事の「2.SVGを書き出す」を参考に書き出しを行います。
自由な形でリンク範囲を作る方法2つ クリッカブルマップ・SVGリンク【実装サンプル付き】
無事、書き出しが完了したら、SVGファイルをVsCodeなどのエディタで開いてみてください。
以下は今回のデモサイトのSVGデータです。
1 2 3 4 5 6 7 8 9 10 11 12 13 14 15 16 17 18 19 20 21 22 23 24 25 26 27 28 29 30 31 32 33 34 35 36 37 38 39 40 41 42 43 44 45 46 47 48 49 50 51 52 53 54 55 56 57 58 59 60 61 62 63 64 65 66 67 68 69 70 71 72 73 74 75 76 77 78 79 80 81 82 83 84 85 86 87 88 89 90 91 92 93 94 95 96 97 98 99 100 101 102 103 104 105 106 107 108 109 110 111 112 113 114 115 116 117 118 119 120 121 122 123 124 125 126 127 128 129 130 131 132 133 134 135 136 137 138 139 140 141 142 143 144 145 146 147 148 149 150 151 152 153 154 155 156 157 158 159 160 161 162 163 164 165 166 167 168 169 170 171 172 | <svg xmlns="http://www.w3.org/2000/svg" xmlns:xlink="http://www.w3.org/1999/xlink" viewBox="0 0 1324 768"> <defs> <style> .cls-1 { fill: url(#名称未設定グラデーション); } .cls-2 { fill: url(#名称未設定グラデーション_2); } .cls-3 { fill: url(#名称未設定グラデーション_3); } .cls-4 { fill: url(#名称未設定グラデーション_4); } .cls-5 { fill: url(#名称未設定グラデーション_5); } .cls-6 { fill: url(#名称未設定グラデーション_6); } .cls-7 { fill: url(#名称未設定グラデーション_7); } .cls-8 { fill: none; } .cls-9 { fill: url(#名称未設定グラデーション_8); } .cls-10 { fill: url(#名称未設定グラデーション_9); } .cls-11 { fill: url(#名称未設定グラデーション_10); } .cls-12 { fill: url(#名称未設定グラデーション_11); } .cls-13 { fill: url(#名称未設定グラデーション_12); } .cls-14 { fill: url(#名称未設定グラデーション_13); } </style> <linearGradient id="名称未設定グラデーション" y1="496.5" x2="121" y2="496.5" gradientTransform="matrix(1, 0, 0, -1, 0, 768)" gradientUnits="userSpaceOnUse"> <stop offset="0" stop-color="#9796f0" /> <stop offset="1" stop-color="#fbc7d4" /> </linearGradient> <linearGradient id="名称未設定グラデーション_2" data-name="名称未設定グラデーション 2" x1="619" y1="576.5" x2="702" y2="576.5" gradientTransform="matrix(1, 0, 0, -1, 0, 768)" gradientUnits="userSpaceOnUse"> <stop offset="0" stop-color="#ddd6f3" /> <stop offset="1" stop-color="#faaca8" /> </linearGradient> <linearGradient id="名称未設定グラデーション_3" data-name="名称未設定グラデーション 3" x1="1166" y1="317" x2="1324" y2="317" gradientTransform="matrix(1, 0, 0, -1, 0, 768)" gradientUnits="userSpaceOnUse"> <stop offset="0" stop-color="#6190e8" /> <stop offset="1" stop-color="#a7bfe8" /> </linearGradient> <linearGradient id="名称未設定グラデーション_4" data-name="名称未設定グラデーション 4" x1="981" y1="549" x2="1051" y2="549" gradientTransform="matrix(1, 0, 0, -1, 0, 768)" gradientUnits="userSpaceOnUse"> <stop offset="0" stop-color="#feac5e" /> <stop offset="0.5" stop-color="#c779d0" /> <stop offset="1" stop-color="#4bc0c8" /> </linearGradient> <linearGradient id="名称未設定グラデーション_5" data-name="名称未設定グラデーション 5" x1="753" y1="495" x2="903" y2="495" gradientTransform="matrix(1, 0, 0, -1, 0, 768)" gradientUnits="userSpaceOnUse"> <stop offset="0" stop-color="#fbed96" /> <stop offset="1" stop-color="#abecd6" /> </linearGradient> <linearGradient id="名称未設定グラデーション_6" data-name="名称未設定グラデーション 6" x1="704" y1="219.5" x2="845" y2="219.5" gradientTransform="matrix(1, 0, 0, -1, 0, 768)" gradientUnits="userSpaceOnUse"> <stop offset="0" stop-color="#ffefba" /> <stop offset="1" stop-color="#fff" /> </linearGradient> <linearGradient id="名称未設定グラデーション_7" data-name="名称未設定グラデーション 7" x1="965" y1="349" x2="1081" y2="349" gradientTransform="matrix(1, 0, 0, -1, 0, 768)" gradientUnits="userSpaceOnUse"> <stop offset="0" stop-color="#dbe6f6" /> <stop offset="1" stop-color="#c5796d" /> </linearGradient> <linearGradient id="名称未設定グラデーション_8" data-name="名称未設定グラデーション 8" x1="169" y1="193.5" x2="382" y2="193.5" gradientTransform="matrix(1, 0, 0, -1, 0, 768)" gradientUnits="userSpaceOnUse"> <stop offset="0" stop-color="#7f7fd5" /> <stop offset="0.5" stop-color="#86a8e7" /> <stop offset="1" stop-color="#91eae4" /> </linearGradient> <linearGradient id="名称未設定グラデーション_9" data-name="名称未設定グラデーション 9" x1="476" y1="290" x2="580" y2="290" gradientTransform="matrix(1, 0, 0, -1, 0, 768)" gradientUnits="userSpaceOnUse"> <stop offset="0" stop-color="#efefbb" /> <stop offset="1" stop-color="#d4d3dd" /> </linearGradient> <linearGradient id="名称未設定グラデーション_10" data-name="名称未設定グラデーション 10" x1="355" y1="654.5" x2="518" y2="654.5" gradientTransform="matrix(1, 0, 0, -1, 0, 768)" gradientUnits="userSpaceOnUse"> <stop offset="0" stop-color="#c9d6ff" /> <stop offset="1" stop-color="#e2e2e2" /> </linearGradient> <linearGradient id="名称未設定グラデーション_11" data-name="名称未設定グラデーション 11" x1="169" y1="696.5" x2="254" y2="696.5" gradientTransform="matrix(1, 0, 0, -1, 0, 768)" gradientUnits="userSpaceOnUse"> <stop offset="0" stop-color="#d9a7c7" /> <stop offset="1" stop-color="#fffcdc" /> </linearGradient> <linearGradient id="名称未設定グラデーション_12" data-name="名称未設定グラデーション 12" x1="1039" y1="725.5" x2="1124" y2="725.5" gradientTransform="matrix(1, 0, 0, -1, 0, 768)" gradientUnits="userSpaceOnUse"> <stop offset="0" stop-color="#c9ffbf" /> <stop offset="1" stop-color="#ffafbd" /> </linearGradient> <linearGradient id="名称未設定グラデーション_13" data-name="名称未設定グラデーション 13" x1="907" y1="87" x2="1081" y2="87" gradientTransform="matrix(1, 0, 0, -1, 0, 768)" gradientUnits="userSpaceOnUse"> <stop offset="0" stop-color="#e1eec3" /> <stop offset="1" stop-color="#f05053" /> </linearGradient> </defs> <g id="item14"> <circle class="cls-1" cx="60.5" cy="271.5" r="60.5" /> </g> <g id="item13"> <circle class="cls-2" cx="660.5" cy="191.5" r="41.5" /> </g> <g id="item12"> <circle class="cls-3" cx="1245" cy="451" r="79" /> </g> <g id="item11"> <circle class="cls-4" cx="1016" cy="219" r="35" /> </g> <g id="item10"> <circle class="cls-5" cx="828" cy="273" r="75" /> </g> <g id="item09"> <circle class="cls-6" cx="774.5" cy="548.5" r="70.5" /> </g> <g id="item08"> <circle class="cls-7" cx="1023" cy="419" r="58" /> </g> <g id="item07"> <circle class="cls-8" cx="994" cy="681" r="87" /> </g> <g id="item06"> <circle class="cls-9" cx="275.5" cy="574.5" r="106.5" /> </g> <g id="item05"> <circle class="cls-10" cx="528" cy="478" r="52" /> </g> <g id="item04"> <circle class="cls-11" cx="436.5" cy="113.5" r="81.5" /> </g> <g id="item03"> <circle class="cls-12" cx="211.5" cy="71.5" r="42.5" /> </g> <g id="item02"> <circle class="cls-13" cx="1081.5" cy="42.5" r="42.5" /> </g> <g id="item01"> <path class="cls-14" d="M1081,681a87,87,0,1,1-87-87A87,87,0,0,1,1081,681Z" /> </g> </svg> |
これをHTMLに貼りつけて、absoluteで配置すれば、位置関係はデザイン通りになり、1つずつabsoluteで配置する必要がなくなります。
また、レスポンシブの際にも、各々の丸い図形同士の位置関係はそのままで、拡大縮小が行われてます。
かなり楽ちんですね笑
貼りつけたsvgのコードはHTMLなので、要素1つ1つをCSSで調整できます。
また、JavaScriptで操作することもできます。
ここで、貼り付けたsvgデータを見てみましょう。
以下のようなHTMLがありますね。
1 2 3 4 5 | <g id="item01"> <path class="cls-14" d="M1081,681a87,87,0,1,1-87-87A87,87,0,0,1,1081,681Z" /> </g> |
Illustlatorでレイヤーを分離したときに、各レイヤーに名前を付けることができ、その際に付けた名前がid名に表示されています。
また、これはHTMLなので試しにこのgタグの塊ごと削除すると、ブラウザ上でもこのgタグに相当する丸い図形が消えますので確認してみてください。
このように、SVGをグループとして書き出してabsoluteで配置するとcssがかなり楽ちんです★
ただ、デメリットもあります。
それは、HTMLが汚く見えることですね。。
もしどうしてもそれが嫌な場合は、頑張って1つ1つをabsoluteで配置し、レスポンシブを考慮して頑張るしかないです笑
GSAPを導入する
丸い図形の準備と、その他テキストの準備、スタイル調整が完了したら、いよいよGSAPを導入していきます。
GSAPの導入方法はいくつかあります。
公式サイトに行くと、以下の赤枠の「Get GSAP」があります。
そこにいくつか導入方法が記載されています。
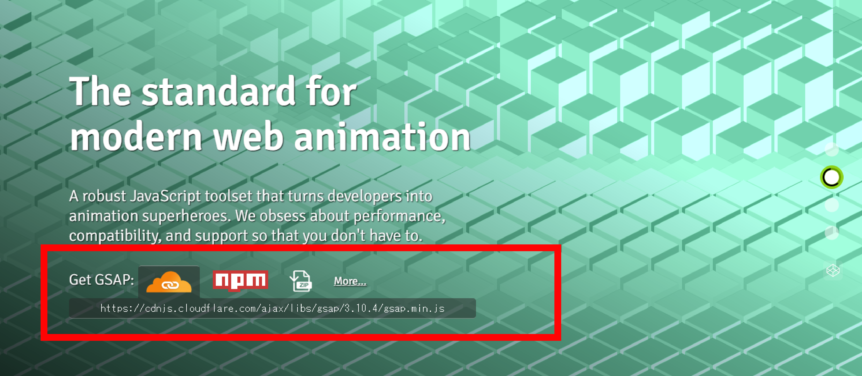
今回は手軽に試したいので、CDNをつかってみます。
headタグもしくはbody閉じタグでCDN読み込みの記述を書きましょう。
▼headタグに書く場合
1 2 3 4 | <script src="https://cdnjs.cloudflare.com/ajax/libs/gsap/3.10.4/gsap.min.js" defer></script> </head> |
▼body閉じタグ直前で書く場合
1 2 3 4 | <script src="https://cdnjs.cloudflare.com/ajax/libs/gsap/3.10.4/gsap.min.js"></script> </body> |
headタグにscriptファイル読み込みの記述を記述する場合は、deferを付けましょう。
こうすることで、HTMLパースが完了した後に、このファイルが読み込まれるので、レンダリングブロックが回避できサイトパフォーマンス的に良いとされています。
■参考記事
scriptタグに async / defer を付けた場合のタイミング
つづいて、GSAPを利用してアニメーションの記述をするためのjsファイルを用意しましょう。
今回私は、プロジェクトフォルダ内に、jsフォルダを作成し、その中にscript.jsという名前で作成してみました。
1 2 3 4 5 6 | / L index.html L js L script.js |
script.jsをindex.htmlで読み込みます。
▼headタグに書く場合(deferを付けることを忘れずに!)
1 2 3 4 5 6 | <script src="https://cdnjs.cloudflare.com/ajax/libs/gsap/3.10.4/gsap.min.js" defer></script> <!-- 追記 --> <script src="./js/script.js" defer></script> </head> |
▼body閉じタグで読み込む場合
1 2 3 4 5 6 | <script src="https://cdnjs.cloudflare.com/ajax/libs/gsap/3.10.4/gsap.min.js"></script> <!-- 追記 --> <script src="./js/script.js"></script> </body> |
GSAPをつかってアニメーションさせる前に。
準備が整ったのでいよいよアニメーションさせていきたいところですが、このアニメーションがどのようになっているのかざっくり解説します。
このアニメーションは以下のような動きが一連になっています。
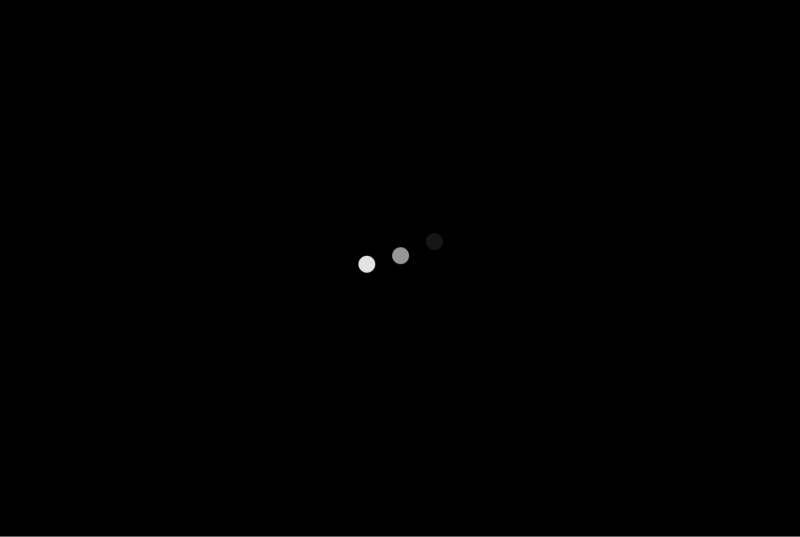
No.1 ドットが1つずつ落ちしてその後消えるアニメーション
No.2 黒背景が上から下に移動して消えるアニメーション

No.3 丸い図形が下からふわっと浮き上がってくるアニメーション

No.4 メインテキストが1文字ずつ下から浮き上がってくるアニメーション
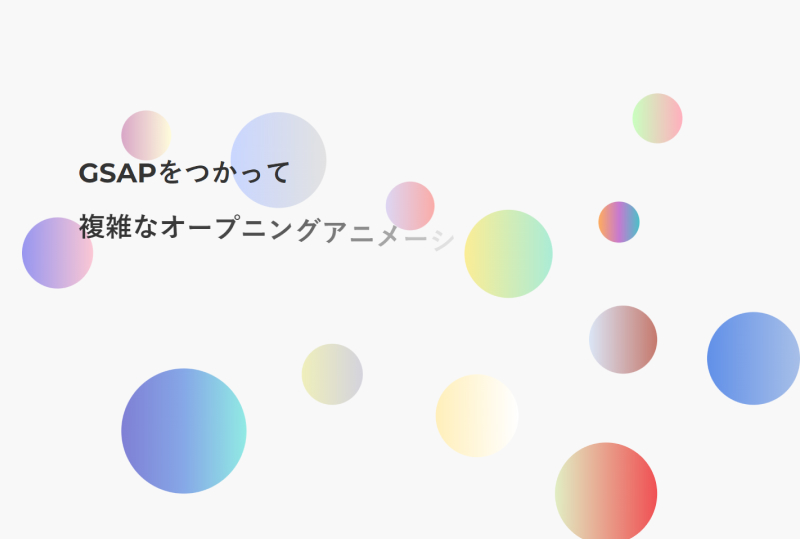
No.5 サブテキストが下から浮き上がってくるアニメーション
と、
No.6 ヘッダーが上から下に移動して表示されるアニメーション
※No.5と6の2つのアニメーションはほぼ同時に発動しています。
これら1つ1つのアニメーションをGSAPを使用して作成しますが、とても簡単にできます。
1つ1つのアニメーションを作成したうえで、それらをどのタイミングで発動させるかを、GSAPのタイムラインというものを使用して自由にいじっていくわけです。
★ポイント
1つ1つのアニメーションを作成し、それらのアニメーションをタイムラインを使って連携させる
スタイル(css)について解説
CSSについて、アニメーションに関係する部分だけ一部抜粋して解説します。
※remで指定していますが、pxでも問題ありません。
▼黒背景(カーテン)
1 2 3 4 5 6 7 8 9 10 11 12 13 14 | .c-loader-bg { position: fixed; top: 0; left: 0; width: 100%; height: 100%; background-color: #000; z-index: 100; display: grid; place-items: center; pointer-events: none; } |
これは「No.2 黒背景が上から下に移動して消えるアニメーション」で使用する黒背景です。
ご覧の通り、fixedで#000のdivを配置しています。
display:gridとplace-items:centerは、div.c-loader-bgの直下にあるdiv.c-loader-dotを、黒背景の上下左右中央に配置するためです。
▼ドット
1 2 3 4 5 6 7 8 9 10 11 12 13 14 15 16 17 18 19 20 | .c-loader-dot { display: inline-flex; align-items: center; justify-content: start; pointer-events: none; } .c-loader-dot > span { display: block; width: 30px; height: 30px; border-radius: 50%; background-color: #fff; } .c-loader-dot > span + span { margin-left: 3rem; } |
これは「No.1 ドットが1つずつ落ちしてその後消えるアニメーション」で使用するドットです。
ドット間の余白をmarginで取っています。
Flexにgapプロパティというものがあり、そちらを使うとより簡単に書くことができます。
以下のような感じですね。
1 2 3 4 5 6 7 8 9 10 11 12 13 14 | .c-loader-dot { 省略 gap: 3rem;/* 追記 */ } .c-loader-dot > span { 省略 } /* .c-loader-dot > span + span { margin-left: 3rem; } */ |
ただ、このgapプロパティはSafariの14.1からしか使えません。
Can I useを見る
Safari14.1は、iOSのバージョンでいうと、14.5です。
iOS13では使えないので、案件でiOS13までカバーしなければいけない場合は使用しないようにしましょう。
iOS13は、日本で1.692%のシェアがあります。(2022年3月31日現在)
まあまあ無視できない数字だと思うのでまだFlexのgapはまだ使えなそうですね。
▼参考ソース
スマタブ info
ちなみに、Gridにもgapプロパティがあり、そちらは問題なく使えます!
Flexのgapは様子見ですが、Gridなら使ってOKと言えるでしょう!
詳しくは、Can i useで調べてみてください!
これ以外のCSSについては特に説明することがありません。
JavaScriptのことは気にせず、いったん普通にコーディングすればOKですね!
HTML⇒CSS⇒最後にJavaScript(GSAP)といった感じでコーディングするとスムーズです!
GSAPを使う時に抑えるべき3つの機能
GSAPの導入が済み、この記事で扱うアニメーションの仕組みがわかったところで、いよいよGSAPを使います!
GSAPにはさまざまな機能があります。
正直たくさんありすぎて覚えられません。
そのため、この記事で扱うアニメーションを実装するために欠かせない機能のみ紹介します。
とりあえず覚えてほしい基本的な記述方法は以下です。
①要素の状態をセットするgsap.set()
1 2 3 4 5 6 7 8 9 10 | /** * アニメーション前の初期状態をセットする * @see https://greensock.com/docs/v3/GSAP/gsap.set */ gsap.set(".selector", { toVars }); // 使い方の例: class名がhogeの要素をopacity:0にして、y座標を30pxにする gsap.set(".hoge", {opacity: 0, y: 30}); |
▶公式ドキュメント: gsap.set()
xやyを指定できますが、これはcssのtransformプロパティのtranslateXとtranslateYと同じ意味です。
xがプラスの方向は、今あなたがみているブラウザの右方向。
yがプラスの方向は、今あなたがみているブラウザの下方向です。
なので、y:30とした場合、要素は画面の下方向に30px移動した位置に移動します。
②要素をある状態に変化させるgsap.to()
1 2 3 4 5 6 7 8 9 10 11 12 13 14 15 16 | /** * 要素を指定された値にアニメーションさせる * @see https://greensock.com/docs/v3/GSAP/gsap.to() */ gsap.to(".selector", { options }); // 使い方の例 gsap.to(".hoge", { x: 100, // x座標を100pxにする backgroundColor: "red", // 背景色をredにする duration: 1, // 1秒間かけて行う delay: 0.5, // 0.5秒後にこのアニメーションを実行する ease: "power2.inOut" // アニメーションのイージングを指定。これには様々な指定ができる }); |
▶公式ドキュメント: gsap.to()
これはアニメーション完了後の状態を指定するためのメソッドですね。
だいたい上記のコメントを読んでいただくとわかるのでご確認ください。
これ以外にも、gsap.from()やgsap.fromTo()というメソッドもあります。
③タイムライン上で各アニメーションを連動させるgsap.timeline()
1 2 3 4 5 6 7 8 9 10 11 12 13 14 15 16 17 18 19 20 21 22 23 24 25 | /** * timelineを作成 * @see https://greensock.com/docs/v3/GSAP/gsap.timeline() */ const tl = gsap.timeline(); tl.to(".selector1", { selector1のアニメーション }).to(".selector2", { selector2のアニメーション }); // 使い方の例 const tl = gsap.timeline(); tl.to(".hoge", { /* 1秒後に、hogeを、0.8秒間かけてopacity:1・y軸座標を0にする */ opacity: 1, y: 0, duration: 0.8, delay: 1 }).to(".fuga", { /* 前のアニメーションが完了する0.2秒前(-=0.2)に、fugaをopacity:0にする */ opacity: 0 }, '-=0.2'); |
▶公式ドキュメント: gsap.timeline()
このタイムライン(timeline)がめちゃくちゃ強力な機能です。
各アニメーションは.to(…).to(…).to(…)という感じで、つなげていき連携させることができます。
また、上記のサンプルを見てわかるように、‘-=0.2’ などと書くことで、1つ1つのアニメーションの動作タイミングを細かく設定できます。
tl.toの中身の書き方は見ての通り、gsap.toでの書き方とほぼ同じです。
この3つが使えるようになればとりあえずはOKです!
公式ドキュメントは英語ですが、DeepLなどで翻訳してみてください。
ただ、公式ドキュメントは情報量が多いので、なんとなく使い方を知って、その後ドキュメントを読むほうが分かりやすい気がします。
以下は公式サイトが出しているGSAPのチートシートです。
これを見ると、「なんとなくこう書けばいいのか」がわかるので、参考にしてみてください。
▼GSAPチートシート
GSAPチートシート
GSAPを書いてアニメーションを実装してみよう
抑えるべき基本的な3つの機能がわかったところで、この記事で扱うデモページのアニメーションを実装してみましょう。
結論
まずは完成コードを以下に記載します。
(※JavaScriptのみ記載しています。)
コメント部分を読んでいただければなんとなくわかりますが、詳細について次で解説します。
1 2 3 4 5 6 7 8 9 10 11 12 13 14 15 16 17 18 19 20 21 22 23 24 25 26 27 28 29 30 31 32 33 34 35 36 37 38 39 40 41 42 43 44 45 46 47 48 49 50 51 52 53 54 55 56 57 58 59 60 61 62 63 64 65 66 67 68 69 70 71 72 73 74 75 76 77 78 79 80 81 82 83 84 85 86 87 88 89 90 91 92 93 94 95 96 97 98 99 100 101 102 103 104 105 106 107 108 109 110 111 112 113 114 115 116 117 118 | /* 文字列を分割しspanで囲む */ const jsText = document.querySelectorAll('.js-mv_title-item'); jsText.forEach(target => { let newText = ''; const text = target.textContent; const result = text.split(''); for (let i = 0; i < result.length; i++) { newText += '<span>' + result[i] + '</span>'; } target.innerHTML = newText; }); /* 以下アニメーション */ const jsLoaderBg = '.js-loader-bg'; // カーテン(黒い背景) const jsDot = '.js-loader-dot-wrap > span'; // ドット const jsBubble = '.js-mv-bubble [id*=item]'; // バブル(丸い図形) const jsText = '.js-mv_title-item span'; // メインビジュアルのタイトル const jsLeadText = '.js-mv_title-lead'; // メインビジュアルのリード文 const jsHeader = '.js-header'; // ヘッダー //初期状態をセット gsap.set( [jsBubble, jsText, jsLeadText], //アニメーションさせない静止状態を指定する { opacity: 0, y: 30 }, ); /* ドット */ gsap.set(jsDot, { opacity: 0, y: -50 }); /* ヘッダー */ gsap.set(jsHeader, { opacity: 0, y: -50 }); // timelineを作成 const tl = gsap.timeline(); tl.to( /* ドット */ /* 0.8秒後に起動 */ jsDot, { opacity: 1, y: 0, duration: 0.8, delay: 0.8, stagger: { amount: 0.5, from: "start", ease: 'power4.inOut' } }, ).to( /* ドット */ /* 前のアニメーションが完了した後、ドットを消す */ jsDot, { opacity: 0 } ).to( /* カーテン */ /* 前のアニメーションが完了した0.5秒後に、カーテンを下へ移動 */ jsLoaderBg, { y: '100%' }, '+=0.5' ).to(jsBubble, { /* バブル */ /* 0.2秒後に、1秒かけてバブルが個別にアニメーション */ opacity: 1, y: 0, duration: 0.8, // seconds stagger: { amount: 0.6, from: "start", ease: "sine.in" } }, '+=0.2').to( /* タイトル */ jsText, { /* 前のアニメーションが完了する0.1秒前に実行 */ opacity: 1, y: 0, stagger: { amount: 1, from: "start", ease: "sine.in" } }, "-=0.1" ).to( /* リード文 */ jsLeadText, { /* 前のアニメーションが完了する0.1秒前に実行 */ opacity: 1, y: 0, }, "-=0.2" ).to( /* ヘッダー */ /* 前のアニメーションと同時 */ jsHeader, { opacity: 1, y: 0, }, '<' ); |
解説
ここからはJavaScriptのコードについてザックリ解説していきます。
文字列を分割しspanで囲む
1 2 3 4 5 6 7 8 9 10 11 12 13 | /* 文字列を分割しspanで囲む */ const jsText = document.querySelectorAll('.js-mv_title-item'); jsText.forEach(target => { let newText = ''; const text = target.textContent; const result = text.split(''); for (let i = 0; i < result.length; i++) { newText += '<span>' + result[i] + '</span>'; } target.innerHTML = newText; }); |
これは以下の赤枠の文字を1文字ずつ分割してspanタグで囲む処理を行っています。

扱いやすいやすいように変数に格納
1 2 3 4 5 6 7 8 | const jsLoaderBg = '.js-loader-bg'; // カーテン(黒い背景) const jsDot = '.js-loader-dot-wrap > span'; // ドット const jsBubble = '.js-mv-bubble [id*=item]'; // バブル(丸い図形) const jsText = '.js-mv_title-item span'; // メインビジュアルのタイトル const jsLeadText = '.js-mv_title-lead'; // メインビジュアルのリード文 const jsHeader = '.js-header'; // ヘッダー |
このあと、gsap.toやgsap.setを使用しますが、その際に指定するセレクタの文字列を予め変数として用意しておきます。
アニメーション前の初期状態をセットする
1 2 3 4 5 6 7 8 9 10 11 12 13 14 15 16 17 18 19 20 21 22 23 | //初期状態をセット gsap.set( [jsBubble, jsText, jsLeadText], //アニメーションさせない静止状態を指定する { opacity: 0, y: 30 }, ); /* ドット */ gsap.set(jsDot, { opacity: 0, y: -50 }); /* ヘッダー */ gsap.set(jsHeader, { opacity: 0, y: -50 }); |
gsap.setを用いて、アニメーション実行前の初期状態をセットします。
もう一度復習ですが、gsap.setの書き方は以下です。
1 2 3 4 5 6 7 | /** * アニメーション前の初期状態をセットする * @see https://greensock.com/docs/v3/GSAP/gsap.set */ gsap.set(".selector", { toVars }); |
setの第一引数は、テキスト、配列、オブジェクトのいずれかを指定できます。
そのため、複数要素に対して同じ初期状態をsetする場合は、配列で一括で指定するといいでしょう。
具体的には、以下のように書くことができます。
1 2 3 4 5 6 | // hogeとfugaとbarを、それぞれopacity:0の状態にセットする gsap.set(['.hoge', '.fuga', '.bar'], { opacity: 0 }); |
この書き方を、以下で記述しています。
1 2 3 4 5 6 7 8 9 10 | gsap.set( [jsBubble, jsText, jsLeadText], //アニメーションさせない静止状態を指定する { opacity: 0, y: 30 }, ); |
これもまた繰り返しになりますが、yのプラス方向は今あなたが見てるブラウザの下方向です。
そのため、y:30とは下方向に30px移動した位置ということです。
つまりここで指定している内容の意味は、jsBubbleとjsTextとjsLeadTextのそれぞれのアニメーション実行前の初期状態を、opacity:0で消えた状態にして、下方向に30px移動した位置にするという意味になります。
タイムラインを作成し、各アニメーションを実行する
まずはtimelineを作成します。
1 2 3 4 | // timelineを作成 const tl = gsap.timeline(); |
次に、タイムライン上で各アニメーションを実行します。
まずはドットのアニメーションからです。
1 2 3 4 5 6 7 8 9 10 11 12 13 14 15 16 17 | tl.to( /* ドット */ /* 0.8秒後に起動 */ jsDot, { opacity: 1, y: 0, duration: 0.8, delay: 0.8, stagger: { amount: 0.5,//0.5秒おきに from: "start", // 左から ease: 'power4.inOut' } }, ) |
アニメーションがスタートしてから0.8秒後にドットのアニメーションが始まります。
初期状態はopacity:0で、yマイナス方向に50pxの位置にありました。
それを、opaciy:1に戻し、yの位置も元に戻しています。
ここで1つポイントがあります。
それはstaggerプロパティです。
1 2 3 4 5 6 7 | stagger: { amount: 0.5,//0.5秒おきに from: "start", // 左から ease: 'power4.inOut' } |
これを指定することで、複数の要素を順番にアニメーションさせることができます。
ここでは、ドットの役目をはたしているspanを左から順番に0.5秒おきにアニメーションさせています。
easeプロパティは、以下の公式ドキュメントを参考にしてみてください。
自分好みのイージングを作成することもできますし、用意されているイージングを指定することもできます。
今回はもともと用意されているイージング(‘power4.inOut’)を指定しています。
この、ドットが上から落ちてくるアニメーションが完了したら、ドットを消す処理を行います。
それが以下ですね。
1 2 3 4 5 6 7 8 9 10 11 | tl.to( /* ドットが上から振ってくるアニメーション(省略) ).to( /* ドット */ /* 前のアニメーションが完了した後、ドットを消す */ jsDot, { opacity: 0 } ) |
次に、カーテン(黒背景)を上から下に移動させるアニメーションを実行します。
1 2 3 4 5 6 7 8 9 10 11 12 13 14 | tl.to( /* ドットが上から振ってくるアニメーション(省略) */ ).to( /* ドットを消すアニメーション(省略) */ ).to( /* カーテン */ /* 前のアニメーションが完了した0.5秒後に、カーテンを下へ移動 */ jsLoaderBg, { y: '100%' }, '+=0.5' ) |
y:100%とすることで、下方向にカーテン(黒背景)を移動させブラウザの外へ追い出しています。
ここでまたポイントがあります。
‘+=0.5’とすることで、前のアニメーション(ドットが消えるアニメーション)が終わってから0.5秒経過した後に、カーテン(黒背景)が移動するアニメーションが実行されるようにしています。
これは、以下のようにdelayを使って書いても同じ結果になりますのでどちらでもOKです。
1 2 3 4 5 6 7 8 9 10 11 12 13 14 | tl.to( /* ドットが上から振ってくるアニメーション(省略) */ ).to( /* ドットを消すアニメーション(省略) */ ).to( /* カーテン */ /* 前のアニメーションが完了した0.5秒後に、カーテンを下へ移動 */ jsLoaderBg, { y: '100%', delay: 0.5 } ) |
バブル(丸い図形)をアニメーションさせる
カーテンのアニメーションが完了したらお次はバブルが下から上にそれぞれ移動しながらふわっと表示されるアニメーションです。
1 2 3 4 5 6 7 8 9 10 11 12 13 14 15 16 17 18 19 20 | tl.to( /* ドットが上から振ってくるアニメーション(省略) */ ).to( /* ドットを消すアニメーション(省略) */ ).to( /* カーテンを移動させるアニメーション(省略) */ ).to(jsBubble, { /* バブル */ /* 0.2秒後に、1秒かけてバブルが個別にアニメーション */ opacity: 1, y: 0, duration: 0.8, // seconds stagger: { amount: 0.6, from: "start", ease: "sine.in" } }, '+=0.2') |
複数の要素を順番にアニメーションさせたいのでstaggerを使用しています。
また、カーテンアニメーションが完了してから0.2秒後にアニメーションを実行させたいので‘+=0.2’としています。
ドットのアニメーションと同じようなコードを書いているので、そろそろGSAPの書き方に慣れてきたのではないでしょうか。
メインビジュアルのタイトルを1文字ずつアニメーション
これについてはバブルのアニメーションとほぼ同じなので説明は割愛します。
1 2 3 4 5 6 7 8 9 10 11 12 13 14 15 16 17 18 19 20 21 22 23 24 | tl.to( /* ドットが上から振ってくるアニメーション(省略) */ ).to( /* ドットを消すアニメーション(省略) */ ).to( /* カーテンを移動させるアニメーション(省略) */ ).to( /* バブルが下からふわっと表示されるアニメーション(省略) */ ).to( /* タイトル */ jsText, { /* 前のアニメーションが完了する0.1秒前に実行 */ opacity: 1, y: 0, stagger: { amount: 1, from: "start", ease: "sine.in" } }, "-=0.1" ) |
リード文とヘッダーのアニメーション
それぞれいたってシンプルなアニメーションです。
1 2 3 4 5 6 7 8 9 10 11 12 13 14 15 16 17 18 19 20 21 22 23 24 25 26 27 28 29 | tl.to( /* ドットが上から振ってくるアニメーション(省略) */ ).to( /* ドットを消すアニメーション(省略) */ ).to( /* カーテンを移動させるアニメーション(省略) */ ).to( /* バブルが下からふわっと表示されるアニメーション(省略) */ ).to( /* メインビジュアルのタイトルを1文字ずつアニメーション(省略) */ ).to( /* リード文 */ jsLeadText, { /* 前のアニメーションが完了する0.1秒前に実行 */ opacity: 1, y: 0, }, "-=0.2" ).to( /* ヘッダー */ /* 前のアニメーションと同時 */ jsHeader, { opacity: 1, y: 0, }, '<' ); |
ポイントは、ヘッダーのアニメーションの方に記載の‘<'です。
これを指定することで、前のアニメーションと同時にアニメーションを実行させることができます。
ソースコード一式を見る
最後に、この記事で実装したアニメーションのソースコードを記載します。
以下のコードは、cssやjsをhtmlファイルに直接書いていますが、実際にはファイルを分けて読み込んでください。
1 2 3 4 5 6 7 8 9 10 11 12 13 14 15 16 17 18 19 20 21 22 23 24 25 26 27 28 29 30 31 32 33 34 35 36 37 38 39 40 41 42 43 44 45 46 47 48 49 50 51 52 53 54 55 56 57 58 59 60 61 62 63 64 65 66 67 68 69 70 71 72 73 74 75 76 77 78 79 80 81 82 83 84 85 86 87 88 89 90 91 92 93 94 95 96 97 98 99 100 101 102 103 104 105 106 107 108 109 110 111 112 113 114 115 116 117 118 119 120 121 122 123 124 125 126 127 128 129 130 131 132 133 134 135 136 137 138 139 140 141 142 143 144 145 146 147 148 149 150 151 152 153 154 155 156 157 158 159 160 161 162 163 164 165 166 167 168 169 170 171 172 173 174 175 176 177 178 179 180 181 182 183 184 185 186 187 188 189 190 191 192 193 194 195 196 197 198 199 200 201 202 203 204 205 206 207 208 209 210 211 212 213 214 215 216 217 218 219 220 221 222 223 224 225 226 227 228 229 230 231 232 233 234 235 236 237 238 239 240 241 242 243 244 245 246 247 248 249 250 251 252 253 254 255 256 257 258 259 260 261 262 263 264 265 266 267 268 269 270 271 272 273 274 275 276 277 278 279 280 281 282 283 284 285 286 287 288 289 290 291 292 293 294 295 296 297 298 299 300 301 302 303 304 305 306 307 308 309 310 311 312 313 314 315 316 317 318 319 320 321 322 323 324 325 326 327 328 329 330 331 332 333 334 335 336 337 338 339 340 341 342 343 344 345 346 347 348 349 350 351 352 353 354 355 356 357 358 359 360 361 362 363 364 365 366 367 368 369 370 371 372 373 374 375 376 377 378 379 380 381 382 383 384 385 386 387 388 389 390 391 392 393 394 395 396 397 398 399 400 401 402 403 404 405 406 407 408 409 410 411 412 413 414 415 416 417 418 419 420 421 422 423 424 425 426 427 428 429 430 431 432 433 434 435 436 437 438 439 440 441 442 443 444 445 446 447 448 449 450 451 452 453 454 455 456 457 458 459 460 461 462 463 464 465 466 467 468 469 470 471 472 473 474 475 476 477 478 479 480 481 482 483 484 485 486 487 488 489 490 491 492 493 494 495 496 497 498 499 500 501 502 503 504 505 506 507 508 509 510 511 512 513 514 515 516 517 518 519 520 521 522 523 524 525 526 527 528 529 530 531 532 533 534 535 536 537 538 539 540 541 542 543 544 545 546 547 548 549 550 551 552 553 554 555 556 557 558 559 560 561 562 563 564 565 566 567 568 569 570 571 572 573 574 575 576 577 578 579 580 581 582 583 584 585 586 587 588 589 590 591 592 593 594 595 596 597 598 599 600 601 602 603 604 605 606 607 608 609 610 611 612 613 614 615 616 617 618 619 620 621 622 623 624 625 626 627 628 629 630 631 632 633 634 635 636 637 638 639 640 641 642 643 644 645 646 647 648 649 650 651 652 653 654 655 656 657 658 659 660 661 662 663 664 665 666 667 668 669 670 671 672 673 674 675 676 677 678 679 680 681 682 683 684 685 686 687 688 689 690 691 692 693 694 695 696 697 698 699 700 701 702 703 704 705 706 707 708 709 710 711 712 713 714 715 716 717 718 719 720 721 722 723 724 725 726 727 728 729 730 731 732 733 734 735 736 737 738 739 740 741 742 743 744 745 746 747 748 749 750 751 752 753 754 755 756 757 758 759 760 | <!DOCTYPE html> <html lang="ja"> <head> <meta charset="utf-8"> <meta name="format-detection" content="telephone=no"> <meta name="viewport" content="width=device-width"> <title>GSAP DEMO</title> <style> @charset "UTF-8"; /*------------------------------------------------------------------------------ reset ------------------------------------------------------------------------------*/ @import url("https://fonts.googleapis.com/css2?family=Montserrat:wght@700&display=swap"); :root { --easing: cubic-bezier(0.2, 1, 0.2, 1); --transition: 0.8s var(--easing); --color-base: #f8f8f8; --color-gray: #ddd; --color-theme: #000; --color-theme-darken: #f12617; --box-shadow: 0.8rem 0.8rem 1.2rem rgba(0, 0, 0, 0.05), -0.8rem -0.8rem 1.2rem #fff; --box-shadow-hover: 1rem 1rem 1.5rem rgba(0, 0, 0, 0.08), -1rem -1rem 1.5rem #fff; --box-shadow-inset: inset 0.8rem 0.8rem 1.2rem rgba(0, 0, 0, 0.05), inset -0.8rem -0.8rem 1.2rem #fff; --box-shadow-dark: 0.8rem 0.8rem 1.2rem rgba(0, 0, 0, 0.1), -0.8rem -0.8rem 1.2rem rgba(#fff, 0.2); } html { font-family: "Montserrat", "游ゴシック体", YuGothic, "游ゴシック", "Yu Gothic", "メイリオ", Meiryo, sans-serif; font-size: 62.5%; line-height: 1.8; height: 100%; word-break: break-word; color: #333; background-color: var(--color-base); -webkit-appearance: none; -webkit-tap-highlight-color: transparent; } body { font-size: 1.6rem; margin: 0; } *, *::before, *::after { -webkit-box-sizing: border-box; box-sizing: border-box; } ::-moz-selection { color: #fff; background: var(--color-theme); } ::selection { color: #fff; background: var(--color-theme); } img { border: 0; margin: 0; } figure { margin: 0; } p { margin: 0; padding: 0; } a { text-decoration: none; color: #333; } ul, ol { margin: 0; padding: 0; list-style: none; } h1, h2, h3, h4, h5, h6 { font-size: 1.6rem; margin: 0; padding: 0; } main { display: block; flex: 1; padding-top: 12.2rem; } .l-wrapper { display: flex; flex-direction: column; min-height: 100vh; position: relative; } .c-loader-bg { position: fixed; top: 0; left: 0; width: 100%; height: 100%; background-color: #000; z-index: 100; display: grid; place-items: center; pointer-events: none; } .c-loader-dot { display: inline-flex; align-items: center; justify-content: start; pointer-events: none; } .c-loader-dot>span { display: block; width: 30px; height: 30px; border-radius: 50%; background-color: #fff; } .c-loader-dot>span+span { margin-left: 3rem; } .l-inner { position: relative; -webkit-box-sizing: content-box; box-sizing: content-box; max-width: 1200px; margin: 0 auto; padding: 0 10rem; } .l-section { border-top: 1px solid #eee; } .l-section .l-inner { padding-top: 8rem; padding-bottom: 8rem; } .c-temp { line-height: 1; } .c-temp .l-inner { display: -webkit-box; display: -webkit-flex; display: -ms-flexbox; display: flex; -webkit-box-align: center; -webkit-align-items: center; -ms-flex-align: center; align-items: center; -webkit-box-pack: justify; -webkit-justify-content: space-between; -ms-flex-pack: justify; justify-content: space-between; padding-top: 4rem; padding-bottom: 4rem; } .c-temp .text { font-size: 2.4rem; font-weight: bold; } .c-temp .button { font-size: 1.4rem; font-weight: bold; display: block; width: 12rem; padding: 1.6rem 0 1.2rem; text-align: center; letter-spacing: 0.1em; color: #fff; border-radius: 100px; background-color: var(--color-theme); } .c-header { position: fixed; top: 0; left: 0; width: 100%; } .c-mv { position: relative; min-height: 78.3rem; margin-left: 4rem; } .c-mv_bubble { position: absolute; z-index: -1; width: 100%; top: 4.4rem; left: 0; } .c-mv_title-wrap { padding-top: 13.7rem; position: relative; z-index: 10; font-weight: bold; } .c-mv_title-item { font-size: 4.8rem; line-height: 2; } .c-mv_title-item span { /* transformプロパティを有効にするため */ display: inline-block; } .c-mv_title-lead { line-height: 2; margin-top: 0.8rem; } .c-footer .l-inner { padding-top: 0; } .c-footer .text { color: var(--color-gray); } .c-info { font-size: 1.4rem; display: inline-block; margin-top: 4rem; margin-bottom: 6.4rem; } .c-info li { position: relative; padding-left: 16px; } .c-info li::before { position: absolute; top: 0.6em; left: 0; display: inline-block; width: 8px; height: 2px; content: ""; background-color: var(--color-gray); } .c-info li+li { margin-top: 0.8rem; } .c-title { font-size: 2.4rem; font-weight: bold; line-height: 1.6; display: inline-block; min-width: 32rem; margin-bottom: 6.4rem; vertical-align: top; } .c-title [class*="ico-"] { font-size: 1.3rem; line-height: 1; display: block; width: 10rem; margin-bottom: 1.2rem; padding: 0.8rem 0 0.6rem; text-align: center; letter-spacing: 0.05em; border-radius: 100px; background-color: var(--color-gray); } .c-title .ico-advanced { color: #fff; background-color: #333; } @media only screen and (max-width: 599px) { html { font-size: 50%; } .pc-tab { display: none !important; } .c-temp .button { font-size: 1.2rem; width: 9rem; } .c-title { min-width: 100%; } } @media only screen and (min-width: 1025px) { .tab-sp { display: none !important; } .c-temp .button { -webkit-transition: var(--transition); transition: var(--transition); } .c-temp .button:hover { background-color: var(--color-theme-darken); } } @media only screen and (min-width: 600px) { .sp { display: none !important; } } @media only screen and (max-width: 1200px) { .c-info { display: block; margin-top: 0; margin-bottom: 6.4rem; } .c-title { margin-bottom: 3.2rem; } } @media only screen and (max-width: 1024px) { html { -webkit-text-size-adjust: 100%; } .l-inner { padding: 0 4rem; } .pc { display: none !important; } .c-temp .l-inner { padding: 3.2rem; } .c-mv { margin-left: 0; } main { padding-top: 8.4rem; } .c-mv_title-item { font-size: 2.4rem; } .c-mv_title-lead { font-size: 1.4rem; } } </style> </head> <body> <div class="l-wrapper"> <!-- 黒い背景とドット --> <div class="c-loader-bg js-loader-bg"> <div class="c-loader-dot js-loader-dot-wrap"> <span></span> <span></span> <span></span> </div> </div> <!-- ヘッダー --> <header class="c-header js-header"> <div class="c-temp"> <div class="l-inner"> <p class="text">[ GSAP DEMO ]</p> <p class="link"><a href="https://b-risk.jp/blog/2022/05/gsap/" class="button">BACK</a></p> </div><!-- /inner-block --> </div><!-- /header --> </header> <main> <!-- MV --> <section class="c-mv js-mv"> <!-- 丸い図形 --> <div class="c-mv_bubble js-mv-bubble"> <svg xmlns="http://www.w3.org/2000/svg" xmlns:xlink="http://www.w3.org/1999/xlink" viewBox="0 0 1324 768"> <defs> <style> .cls-1 { fill: url(#名称未設定グラデーション); } .cls-2 { fill: url(#名称未設定グラデーション_2); } .cls-3 { fill: url(#名称未設定グラデーション_3); } .cls-4 { fill: url(#名称未設定グラデーション_4); } .cls-5 { fill: url(#名称未設定グラデーション_5); } .cls-6 { fill: url(#名称未設定グラデーション_6); } .cls-7 { fill: url(#名称未設定グラデーション_7); } .cls-8 { fill: none; } .cls-9 { fill: url(#名称未設定グラデーション_8); } .cls-10 { fill: url(#名称未設定グラデーション_9); } .cls-11 { fill: url(#名称未設定グラデーション_10); } .cls-12 { fill: url(#名称未設定グラデーション_11); } .cls-13 { fill: url(#名称未設定グラデーション_12); } .cls-14 { fill: url(#名称未設定グラデーション_13); } </style> <linearGradient id="名称未設定グラデーション" y1="496.5" x2="121" y2="496.5" gradientTransform="matrix(1, 0, 0, -1, 0, 768)" gradientUnits="userSpaceOnUse"> <stop offset="0" stop-color="#9796f0" /> <stop offset="1" stop-color="#fbc7d4" /> </linearGradient> <linearGradient id="名称未設定グラデーション_2" data-name="名称未設定グラデーション 2" x1="619" y1="576.5" x2="702" y2="576.5" gradientTransform="matrix(1, 0, 0, -1, 0, 768)" gradientUnits="userSpaceOnUse"> <stop offset="0" stop-color="#ddd6f3" /> <stop offset="1" stop-color="#faaca8" /> </linearGradient> <linearGradient id="名称未設定グラデーション_3" data-name="名称未設定グラデーション 3" x1="1166" y1="317" x2="1324" y2="317" gradientTransform="matrix(1, 0, 0, -1, 0, 768)" gradientUnits="userSpaceOnUse"> <stop offset="0" stop-color="#6190e8" /> <stop offset="1" stop-color="#a7bfe8" /> </linearGradient> <linearGradient id="名称未設定グラデーション_4" data-name="名称未設定グラデーション 4" x1="981" y1="549" x2="1051" y2="549" gradientTransform="matrix(1, 0, 0, -1, 0, 768)" gradientUnits="userSpaceOnUse"> <stop offset="0" stop-color="#feac5e" /> <stop offset="0.5" stop-color="#c779d0" /> <stop offset="1" stop-color="#4bc0c8" /> </linearGradient> <linearGradient id="名称未設定グラデーション_5" data-name="名称未設定グラデーション 5" x1="753" y1="495" x2="903" y2="495" gradientTransform="matrix(1, 0, 0, -1, 0, 768)" gradientUnits="userSpaceOnUse"> <stop offset="0" stop-color="#fbed96" /> <stop offset="1" stop-color="#abecd6" /> </linearGradient> <linearGradient id="名称未設定グラデーション_6" data-name="名称未設定グラデーション 6" x1="704" y1="219.5" x2="845" y2="219.5" gradientTransform="matrix(1, 0, 0, -1, 0, 768)" gradientUnits="userSpaceOnUse"> <stop offset="0" stop-color="#ffefba" /> <stop offset="1" stop-color="#fff" /> </linearGradient> <linearGradient id="名称未設定グラデーション_7" data-name="名称未設定グラデーション 7" x1="965" y1="349" x2="1081" y2="349" gradientTransform="matrix(1, 0, 0, -1, 0, 768)" gradientUnits="userSpaceOnUse"> <stop offset="0" stop-color="#dbe6f6" /> <stop offset="1" stop-color="#c5796d" /> </linearGradient> <linearGradient id="名称未設定グラデーション_8" data-name="名称未設定グラデーション 8" x1="169" y1="193.5" x2="382" y2="193.5" gradientTransform="matrix(1, 0, 0, -1, 0, 768)" gradientUnits="userSpaceOnUse"> <stop offset="0" stop-color="#7f7fd5" /> <stop offset="0.5" stop-color="#86a8e7" /> <stop offset="1" stop-color="#91eae4" /> </linearGradient> <linearGradient id="名称未設定グラデーション_9" data-name="名称未設定グラデーション 9" x1="476" y1="290" x2="580" y2="290" gradientTransform="matrix(1, 0, 0, -1, 0, 768)" gradientUnits="userSpaceOnUse"> <stop offset="0" stop-color="#efefbb" /> <stop offset="1" stop-color="#d4d3dd" /> </linearGradient> <linearGradient id="名称未設定グラデーション_10" data-name="名称未設定グラデーション 10" x1="355" y1="654.5" x2="518" y2="654.5" gradientTransform="matrix(1, 0, 0, -1, 0, 768)" gradientUnits="userSpaceOnUse"> <stop offset="0" stop-color="#c9d6ff" /> <stop offset="1" stop-color="#e2e2e2" /> </linearGradient> <linearGradient id="名称未設定グラデーション_11" data-name="名称未設定グラデーション 11" x1="169" y1="696.5" x2="254" y2="696.5" gradientTransform="matrix(1, 0, 0, -1, 0, 768)" gradientUnits="userSpaceOnUse"> <stop offset="0" stop-color="#d9a7c7" /> <stop offset="1" stop-color="#fffcdc" /> </linearGradient> <linearGradient id="名称未設定グラデーション_12" data-name="名称未設定グラデーション 12" x1="1039" y1="725.5" x2="1124" y2="725.5" gradientTransform="matrix(1, 0, 0, -1, 0, 768)" gradientUnits="userSpaceOnUse"> <stop offset="0" stop-color="#c9ffbf" /> <stop offset="1" stop-color="#ffafbd" /> </linearGradient> <linearGradient id="名称未設定グラデーション_13" data-name="名称未設定グラデーション 13" x1="907" y1="87" x2="1081" y2="87" gradientTransform="matrix(1, 0, 0, -1, 0, 768)" gradientUnits="userSpaceOnUse"> <stop offset="0" stop-color="#e1eec3" /> <stop offset="1" stop-color="#f05053" /> </linearGradient> </defs> <g id="item14"> <circle class="cls-1" cx="60.5" cy="271.5" r="60.5" /> </g> <g id="item13"> <circle class="cls-2" cx="660.5" cy="191.5" r="41.5" /> </g> <g id="item12"> <circle class="cls-3" cx="1245" cy="451" r="79" /> </g> <g id="item11"> <circle class="cls-4" cx="1016" cy="219" r="35" /> </g> <g id="item10"> <circle class="cls-5" cx="828" cy="273" r="75" /> </g> <g id="item09"> <circle class="cls-6" cx="774.5" cy="548.5" r="70.5" /> </g> <g id="item08"> <circle class="cls-7" cx="1023" cy="419" r="58" /> </g> <g id="item07"> <circle class="cls-8" cx="994" cy="681" r="87" /> </g> <g id="item06"> <circle class="cls-9" cx="275.5" cy="574.5" r="106.5" /> </g> <g id="item05"> <circle class="cls-10" cx="528" cy="478" r="52" /> </g> <g id="item04"> <circle class="cls-11" cx="436.5" cy="113.5" r="81.5" /> </g> <g id="item03"> <circle class="cls-12" cx="211.5" cy="71.5" r="42.5" /> </g> <g id="item02"> <circle class="cls-13" cx="1081.5" cy="42.5" r="42.5" /> </g> <g id="item01"> <path class="cls-14" d="M1081,681a87,87,0,1,1-87-87A87,87,0,0,1,1081,681Z" /> </g> </svg> </div> <div class="l-inner"> <!-- テキスト類 --> <div class="c-mv_title-wrap"> <div class="c-mv_title"> <div class="c-mv_title-item js-mv_title-item">GSAPをつかって</div> <div class="c-mv_title-item js-mv_title-item">複雑なオープニングアニメーションを作ってみた!</div> </div> <p class="c-mv_title-lead js-mv_title-lead">GSAP is Professional-grade JavaScript animation for the modern web</p> </div> </div> </section> </main> </div><!-- /wrapper --> <!-- GSAP読み込み --> <script src="https://cdnjs.cloudflare.com/ajax/libs/gsap/3.10.4/gsap.min.js"></script> <script> (function () { 'use strict'; /* 文字列を分割しspanで囲む */ (function () { const jsText = document.querySelectorAll('.js-mv_title-item'); jsText.forEach(target => { let newText = ''; const text = target.textContent; const result = text.split(''); for (let i = 0; i < result.length; i++) { newText += '<span>' + result[i] + '</span>'; } target.innerHTML = newText; }); })(); /* MVアニメーション */ (function () { /* 以下アニメーション */ const jsLoaderBg = '.js-loader-bg'; // カーテン(黒い背景) const jsDot = '.js-loader-dot-wrap > span'; // ドット const jsBubble = '.js-mv-bubble [id*=item]'; // バブル(丸い図形) const jsText = '.js-mv_title-item span'; // メインビジュアルのタイトル const jsLeadText = '.js-mv_title-lead'; // メインビジュアルのリード文 const jsHeader = '.js-header'; // ヘッダー //初期状態をセット gsap.set( [jsBubble, jsText, jsLeadText], //アニメーションさせない静止状態を指定する { opacity: 0, y: 30 }, ); /* ドット */ gsap.set(jsDot, { opacity: 0, y: -50 }); /* ヘッダー */ gsap.set(jsHeader, { opacity: 0, y: -50 }); gsap.set(['.hoge', '.fuga', '.bar'], { opacity: 0 }); // timelineを作成 const tl = gsap.timeline(); tl.to( /* ドット */ /* 0.8秒後に起動 */ jsDot, { opacity: 1, y: 0, duration: 0.8, delay: 0.8, stagger: { amount: 0.5, from: "start", ease: 'power4.inOut' } }, ).to( /* ドット */ /* 前のアニメーションが完了した後、ドットを消す */ jsDot, { opacity: 0 } ).to( /* カーテン */ /* 前のアニメーションが完了した0.5秒後に、カーテンを下へ移動 */ jsLoaderBg, { y: '100%' }, '+=0.5' ).to(jsBubble, { /* バブル */ /* 0.2秒後に、1秒かけてバブルが個別にアニメーション */ opacity: 1, y: 0, duration: 0.8, // seconds stagger: { amount: 0.6, from: "start", ease: "sine.in" } }, '+=0.2').to( /* タイトル */ jsText, { /* 前のアニメーションが完了する0.1秒前に実行 */ opacity: 1, y: 0, stagger: { amount: 1, from: "start", ease: "sine.in" } }, "-=0.1" ).to( /* リード文 */ jsLeadText, { /* 前のアニメーションが完了する0.1秒前に実行 */ opacity: 1, y: 0, }, "-=0.2" ).to( /* ヘッダー */ /* 前のアニメーションと同時 */ jsHeader, { opacity: 1, y: 0, }, '<' ); })(); })(); </script> </body> </html> |
まとめ
ここまでお疲れ様でした!
最初は難しそうだと思ったかもしれませんが、意外に簡単ですよね?(SVG書き出しのところは慣れないと難しいですが。)
GSAPを使用して書いているJavaScriptのコードはいたってシンプルであることがわかったかと思います。
gsap.setで初期状態をセットして、timelineを作成、timelineに対して.toでアニメーションをつなげていく。
これがこのアニメーションの大枠です。
めちゃくちゃシンプルですね。
GSAPには、まだまだたくさんの機能やGSAPを拡張したプラグインなんかもあります。
よく使われるのがScrollTriggerです。
これとGSAPを組み合わせたりするとさらにリッチなアニメーションを作成することができるでしょう。
皆さんもぜひ、この記事をきっかけに色々学習してみてください!
▼参考記事
https://ics.media/entry/200805/
▼GSAPのチートシート(これはブクマ必須!)
GSAP3チートシート


