WebGLとは、手軽に3Dコンテンツを制御できるJavaScriptライブラリです。
そのWebGLを簡単に扱えるライブラリ「three.js」を使って、クオリティアップを目指したサイトを作成してみようと思います。
本記事では、WebGLを使った背景に3Dグラフィックスを描画する方法をデモ付きでご紹介していきます。
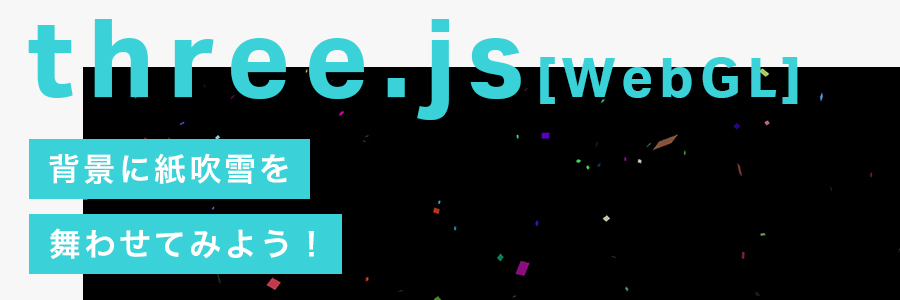
今回は以下の画像のような紙吹雪風にパーティクルを飛ばす方法をご紹介します。

完成形のデモはこちらになります。
紙吹雪風パーティクル
目次
環境の準備
HTMLファイルと作業用JavaScriptファイルを用意します。
HTMLソース
1 2 3 4 5 6 7 8 9 10 11 12 13 | <html> <head> <meta charset="utf-8"> <title>three.js</title> <script src="https://cdnjs.cloudflare.com/ajax/libs/three.js/r128/three.min.js"></script> <script src="js/common.js"></script> </head> <body> <canvas id="canvas"></canvas> </body> </html> |
three.js本体と作業用jsファイルを読み込み、canvasエリアを用意します。
作業用javascriptソース
1 2 3 4 5 6 7 8 9 10 11 12 13 14 15 16 17 18 19 20 21 22 23 24 25 26 27 28 29 30 31 32 33 34 35 36 37 | // ページの読み込みを待つ window.addEventListener('load', init); // canvasのサイズを指定 const width = window.innerWidth; //ブラウザの横の長さ const height = window.innerHeight; //ブラウザの縦の長さ function init() { // シーンを作る const scene = new THREE.Scene(); // カメラを作る const camera = new THREE.PerspectiveCamera(45, width / height); camera.position.set(0, 0, 1000); // x,y,z座標でカメラの場所を指定 // レンダラーを作る const canvasElement = document.querySelector('#canvas') //HTMLのcanvasのid const renderer = new THREE.WebGLRenderer({ canvas: canvasElement }); renderer.setSize(width, height); // ライトを作る const light = new THREE.DirectionalLight(0xFFFFFF, 1); //平行光源(色、光の強さ) light.position.set( 0, 0, 1000 ); scene.add(light); // 3Dオブジェクトを作る //アニメ―ション function start() { renderer.render(scene, camera); } start(); } |
オブジェクトはこのあと説明しつつご紹介していくので、空けています。
それぞれの役割は、こちらのブログでご紹介しているので今回は省きます。
JavaScript経験者におすすめ!ウェブサイトに3Dグラフィックを描画できるthree.js(WebGL)を使ってみよう
これで作業環境の作成は完成になります。
この時点では以下デモのように真っ暗の画面になります。
正方形の作成
環境が整ったら、まず基準となる正方形を用意します。
1 2 3 4 5 6 7 | // 3Dオブジェクトを作る let geometry = new THREE.PlaneGeometry( 200, 200 ); let material = new THREE.MeshBasicMaterial( {color: 0xffffff, side: THREE.DoubleSide} ); let plane = new THREE.Mesh( geometry, material ); scene.add( plane ); |
今回は紙吹雪風なのでgeometryの形状を立方体ではなく、平面の「PlaneGeometry」にします。
パーティクルを量産
今回作成したいのは紙吹雪風のパーティクルなので、まずパーティクルを量産します。
表示位置はランダムにします。
全体のコードはこちらになります。
1 2 3 4 5 6 7 8 9 10 11 12 13 14 15 16 17 18 19 20 21 22 23 24 25 26 27 | // 3Dオブジェクトを作る const x_size = window.innerWidth; const y_size = window.innerHeight; const length = 600; const plane_scale = 6; const plane = []; for(let i=0; i<length; i++){ let geometry = new THREE.PlaneGeometry( plane_scale, plane_scale ); let material = new THREE.MeshBasicMaterial({ color: '0xffffff', side: THREE.DoubleSide }); plane[i] = new THREE.Mesh( geometry, material ); plane[i].position.x = x_size * (Math.random() - 0.5); plane[i].position.y = y_size * (Math.random() - 0.5); plane[i].position.z = x_size * (Math.random() - 0.5); scene.add( plane[i] ); } function random(min, max) { let rand = Math.floor((min + (max - min + 1) * Math.random())); return rand; } |
それぞれ解説していきたいと思います。
初期値を宣言
1 2 3 4 5 6 7 | const x_size = window.innerWidth; const y_size = window.innerHeight; const length = 600; const plane_scale = 6; const plane = []; |
まず下準備となる変数を宣言します。
x_size、y_size
パーティクルの位置を決めるため、幅と高さを指定します。今回はcanvasと同じサイズにします。
length
パーティクルの数を指定します。ここに指定した数値の分だけ量産されます。
あまり大きい数値にすると重くなってしまうので、適宜環境を考慮した数値にしてください。
今回は600個量産されるようにしました。
plane_scale
パーティクルのサイズを決めます。今回は正方形にするのでサイズを決める変数は一つですが、長方形などにしたい場合はもう一つ変数が必要になります。
plane
量産したパーティクルを格納する配列です。
ループして大量生成
1 2 3 4 5 6 7 8 9 10 11 12 13 14 15 16 | for(let i=0; i<length; i++){ let geometry = new THREE.PlaneGeometry( plane_scale, plane_scale ); let material = new THREE.MeshBasicMaterial({ color: '0xffffff', side: THREE.DoubleSide }); plane[i] = new THREE.Mesh( geometry, material ); // ランダム配置 plane[i].position.x = x_size * (Math.random() - 0.5); plane[i].position.y = y_size * (Math.random() - 0.5); plane[i].position.z = x_size * (Math.random() - 0.5); scene.add( plane[i] ); } |
変数lengthの数だけジオメトリが生成されるようにforループで囲みます。
PlaneGeometryのサイズ指定に変数plane_scaleを指定します。
ランダム配置
「Math.random()」を使用して位置がバラバラになるようにします。
0~1未満までの少数による乱数を生成できます。
これで大量に正方形が生成されたと思います。
紙吹雪風パーティクル②_パーティクルの量産
パーティクルを動かす
配置をランダムにしたことにより全体に広がりましたが、このままでは紙吹雪のようには見えませんよね。
実際の紙吹雪のようにひらひらと動かしていきましょう。
ジオメトリを回転させる
1 2 3 4 5 6 7 8 9 10 11 12 13 14 | tick(); function tick() { for(let i=0; i<length; i++){ plane[i].rotation.y += (Math.random()*0.1); plane[i].rotation.x += (Math.random()*0.1); plane[i].rotation.z += (Math.random()*0.1); } renderer.render(scene, camera); requestAnimationFrame(tick); } |
関数tick内で再びforループとMath.random()を使い、各ジオメトリに回転を付けます。
これでひらひらと舞っているような動きになりました。
カメラを回転させる
しかし、現状では同じ場所で回転しているだけになってしまうのでカメラを回転させて、ひらひらと舞って画面外に出ていくような動きを付けたいと思います。
1 2 3 4 5 6 7 8 9 10 11 12 13 14 15 16 17 18 19 20 21 22 23 24 | let rot = 0; tick(); function tick() { rot += 0.2; // 毎フレーム角度を0.2度ずつ足していく // ラジアンに変換する const radian = rot * Math.PI / 180; // 角度に応じてカメラの位置を設定 camera.position.x = 1000 * Math.sin(radian); camera.position.z = 1000 * Math.cos(radian); camera.lookAt(new THREE.Vector3(0, 0, 0)); for(let i=0; i<length; i++){ plane[i].rotation.y += (Math.random()*0.1); plane[i].rotation.x += (Math.random()*0.1); plane[i].rotation.z += (Math.random()*0.1); } renderer.render(scene, camera); requestAnimationFrame(tick); } |
まずフレーム毎に配置角度を0.2度ずつ加算していきます。
それをradianに変換します。変換したradianをcameraオブジェクトのpositionプロパティに代入します。今回は横移動だけですので、Y軸は指定しません。
カメラは常に中央を見るようにしておきたいのでcameraオブジェクトのlookAt()メソッドを使って原点座標(0,0,0)を指定します。
どの位置からでも指定した座標に強制的に向かせることが出来る命令。
これで紙吹雪のようにパーティクルが舞います。
カラーをランダムにする
紙吹雪風パーティクルは完成しましたが一色ではなく様々な色が合った方が華やかになると思います。
1 2 3 4 5 6 7 8 9 10 11 12 13 | let rect = []; for (var ci = 0; ci < length; ci++) { var color = "0x" + Math.floor(Math.random() * 16777215).toString(16); var material = new THREE.MeshBasicMaterial({ color: Number(color), opacity: 0.8, // お好みで transparent: true, // "opacity"を付けるときは必須 side: THREE.DoubleSide }); rect.push(new THREE.Mesh(geometry, material)); }; |
大量生成のforループ内に、カラー用のforループを作成し変数colorを宣言します。
Three.jsでは色の指定を”0x”の後を16進数で表現することが推奨されているので、0xの後ろにランダムで16進数の文字列を生成します。
Math.floor()
Math.floorメソッドは数値の小数点以下を切り捨てます。16進数のカラーコードには小数点は無いので小数点以下を切り捨てるために記述します。
Math.random() * 16777215
16777215は、RGB値の最大値になります。これとMath.random()をかけてランダムに数値を計算します。
.toString(16)
toStringメソッドは対象の数値を指定した基数の形式で表した文字列を返すメソッドになります。指定可能な数値は2~36までです。
今回は16進数で表した文字列を返したいので16を指定します。
material内で指定したcolorにNumber()メソッドで囲んだ変数colorを指定します。
数値として10進数、16進数、実数、浮動小数等を使用出来るメソッド。0x(または0X)で始まると16進数と解釈してくれます。
色を変えたデモはこちらになります。
HTMLでテキストを配置するとより奥行きが感じられます。
紙吹雪風パーティクル⑤_カラーをランダムにする
以上の手順で作成していけば以下完成版のデモのように紙吹雪風パーティクルが実装出来たかと思います。
紙吹雪風パーティクル
おまけ
今回作成したデモをアレンジして、紙吹雪風パーティクル以外のパターンを作成してみました。
水中で気泡が上がっていく風
1 2 3 4 5 6 7 8 9 10 11 12 13 14 15 16 17 18 19 20 21 22 23 24 25 26 27 28 29 30 31 32 33 34 35 36 37 38 39 40 41 42 43 44 45 46 47 48 49 50 51 52 53 54 55 56 57 58 59 60 61 62 63 64 65 66 67 68 69 70 71 72 73 74 75 76 77 78 79 80 81 82 83 84 85 86 | // ページの読み込みを待つ window.addEventListener('load', init); // canvasのサイズを指定 const width = window.innerWidth; //ブラウザの横の長さ const height = window.innerHeight; //ブラウザの縦の長さ function init() { // シーンを作る const scene = new THREE.Scene(); // カメラを作る const camera = new THREE.PerspectiveCamera(45, width / height); camera.position.set(0, 500, 1000); // x,y,z座標でカメラの場所を指定 // レンダラーを作る const canvasElement = document.querySelector('#canvas') //HTMLのcanvasのid const renderer = new THREE.WebGLRenderer({ canvas: canvasElement, antialias: true, //アンチエイリアス alpha: true }); renderer.setSize(width, height); // ライトを作る const light = new THREE.AmbientLight(0xFFFFFF, 1.0); //環境光源(色、光の強さ) light.position.set( 0, 0, 0 ); scene.add(light); // 3Dオブジェクトを作る const x_size = window.innerWidth; const y_size = window.innerHeight; const length = 300; const plane_scale = 4; const plane = []; for(let i=0; i<length; i++){ let geometry = new THREE.SphereGeometry( plane_scale, plane_scale, plane_scale ); var material = new THREE.MeshBasicMaterial({ color: '0xcccccc', opacity: 0.5, transparent: true }); plane[i] = new THREE.Mesh( geometry, material ); plane[i].position.x = x_size * (Math.random() - 0.5); plane[i].position.y = y_size * (Math.random() - 0.5); plane[i].position.z = x_size * (Math.random() - 0.5); scene.add( plane[i] ); } function random(min, max) { let rand = Math.floor((min + (max - min + 1) * Math.random())); return rand; } tick(); function tick() { for(let i=0; i<length; i++){ // ジオメトリを下から上に動かす plane[i].position.x += (random(-5, 5)*0.1); plane[i].position.y += 2.5; plane[i].position.z += (random(-5, 5)*0.1); if (plane[i].position.y > height) { // ジオメトリの位置がウィンドウの高さより大きくなったら初期位置に戻す plane[i].position.x = x_size * (Math.random() - 0.5); plane[i].position.y = 0; plane[i].position.z = x_size * (Math.random() - 0.5); } } renderer.render(scene, camera); requestAnimationFrame(tick); } //アニメ―ション function start() { renderer.render(scene, camera); } start(); } |
雨が降っている風
1 2 3 4 5 6 7 8 9 10 11 12 13 14 15 16 17 18 19 20 21 22 23 24 25 26 27 28 29 30 31 32 33 34 35 36 37 38 39 40 41 42 43 44 45 46 47 48 49 50 51 52 53 54 55 56 57 58 59 60 61 62 63 64 65 66 67 68 69 70 71 72 73 74 75 76 77 78 79 80 81 82 83 84 | // ページの読み込みを待つ window.addEventListener('load', init); // canvasのサイズを指定 const width = window.innerWidth; //ブラウザの横の長さ const height = window.innerHeight; //ブラウザの縦の長さ function init() { // シーンを作る const scene = new THREE.Scene(); scene.rotation.x = Math.PI; // カメラを作る const camera = new THREE.PerspectiveCamera(45, width / height); camera.position.set(0, -500, 1000); // x,y,z座標でカメラの場所を指定 // レンダラーを作る const canvasElement = document.querySelector('#canvas') //HTMLのcanvasのid const renderer = new THREE.WebGLRenderer({ canvas: canvasElement, antialias: true, //アンチエイリアス alpha: true, }); renderer.setSize(width, height); // ライトを作る const light = new THREE.AmbientLight(0xFFFFFF, 1.0); //環境光源(色、光の強さ) light.position.set( 0, 0, 0 ); scene.add(light); // 3Dオブジェクトを作る const x_size = window.innerWidth; const y_size = window.innerHeight; const length = 600; const plane_scale = 0.5; const plane_scale02 = 10; const plane = []; for(let i=0; i<length; i++){ let geometry = new THREE.PlaneGeometry( plane_scale, plane_scale02 ); var material = new THREE.MeshBasicMaterial({ color: '0xafafb0', opacity: 0.4, transparent: true, side: THREE.DoubleSide }); plane[i] = new THREE.Mesh( geometry, material ); plane[i].position.x = x_size * (Math.random() - 0.5); plane[i].position.y = y_size * (Math.random() - 0.5); plane[i].position.z = x_size * (Math.random() - 0.5); scene.add( plane[i] ); } function random(min, max) { let rand = Math.floor((min + (max - min + 1) * Math.random())); return rand; } tick(); function tick() { for(let i=0; i<length; i++){ plane[i].position.x += (random(-5, 5)*0); plane[i].position.y += 5.5; if (plane[i].position.y > height) { plane[i].position.x = x_size * (Math.random() - 0.5); plane[i].position.y = 0; } } renderer.render(scene, camera); requestAnimationFrame(tick); } //アニメ―ション function start() { renderer.render(scene, camera); } start(); } |
背景のグラデーション
上記二つのデモの背景はグラデーションになっています。
1 2 3 | scene.background = new THREE.Color(); |
シーンの設定で背景色を決めることが出来ますが、グラデーションを指定することは出来ません。
なので背景色をグラデーションにしたい場合はcanvasにCSSで背景色を指定します。
しかし、ただCSSにグラデーションを指定しただけではグラデーションになってくれません。
1 2 3 4 5 | const renderer = new THREE.WebGLRenderer({ alpha: true }); |
rendererに「alpha: true」を指定する必要があります。
canvas要素がアルファバッファ(透明度)を含めるかどうかを決めるフラグ。
デフォルトはfalseで透過は無効状態。
まとめ
three.jsを用いて、パーティクルを量産して動的な背景を実装する方法を紹介致しました。
今回紹介したものはカメラ自体を回転させて動かしていましたが、マウスに合わせて回転したりするような動作を付け加えるともっと印象深いサイトになると思います。
おまけの気泡が上がっていく風も上から落ちてくる形にすれば、雪が降っているような表現も出来ますし、同じ箇所でふわふわと動かすような動きにすればシャボン玉が浮いているような表現も出来ると思います。
この記事を読んだ方のサイト制作の力になれば幸いです。
手軽にリッチなサイトに変わる!3Dグラフィックを描画できるthree.js(WebGL)でサイトをアレンジしてみよう
こちらのブログでも、three.jsを使ったアレンジ方法を紹介しています。
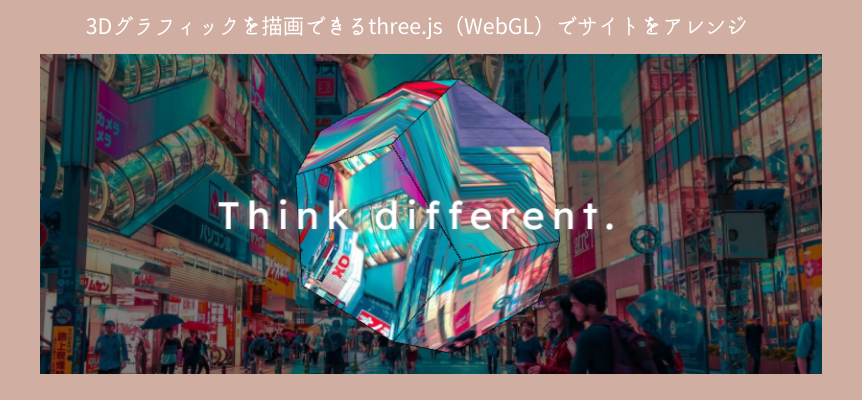
「見出しの後ろに十二面体のオブジェクトがあるウェブページ」の作成方法を紹介しているので合わせて見て頂くとさらに表現の幅が広がると思います。
参考サイト
カメラ制御
Three.jsのカメラの制御(ics.media)
パーティクルの生成
WebGLでエモいパーティクルを飛ばして音楽を再生する!(Qiita)
色をランダムにする
【Three.js】複数のブロックを散らしてみる(Qiita)
グラデーション背景にする
Three.jsでScene背景にグラデーションを設定したい(PisukeCode – Web開発まとめ)

 手軽にリッチなサイトに変わる!3Dグラフィックを描画できるthree.js(WebGL)でサイトをアレンジしてみよう


